Deploying Nomad on NixOS
I decided to run HashiCorp’s Nomad on my dev server, that runs NixOS. The process was almost straightforward and here’s how I went from “I’ve never used Nomad before” to “it works for me”.

This is what I want: Nomad 1.6, Docker and Podman task drivers. I also want a separate ZFS dataset for Nomad’s data. Firecracker and Singularity support is also of my interest, but not for now.
Installing Nomad on NixOS is neat, as is with other services/packages in this operating system. This Nix snippet does everything I need, installation and configuration:
{ lib, pkgs, ... }:
{
  services.nomad = {
    enable = true;
    package = pkgs.nomad_1_6;

    # Add extra plugins to Nomads plugin directory.
    extraSettingsPlugins = [ pkgs.nomad-driver-podman ];
    # Add Docker driver.
    enableDocker = true;

    # Nomad as Root to access Docker/Podman sockets.
    dropPrivileges = false;

    # Nomad configuration, as Nix attribute set.
    settings = {
      client.enabled = true;
      server = {
        enabled = true;
        bootstrap_expect = 1;
      };
      plugin = [{
        nomad-driver-podman = {
          config = { };
        };
      }];
    };
  };

  # I don't Nomad starting when the system boots.
  systemd.services.nomad.wantedBy = lib.mkForce [ ];

  # Handy packages
  environment.systemPackages = with pkgs; [
    nomad-driver-podman # Podman driver plugin.

    damon # TUI for Nomad.
  ];
}
The tricky part is figuring out how to write the Nomad’s configuration (the
settings attribute) using Nix. The official documentation suggests HCL for the
configuration and all examples use it. But NixOS uses JSON instead, which is
also valid. I used an online HCL to JSON converter to translate the examples
in the documentation.
I already had Podman (in rootless mode 🙂) installed and now I also want Docker. This is what I use to have them:
{ pkgs, ... }:
{
  virtualisation = {
    docker.enable = true;
    podman = {
      enable = true;
      dockerCompat = false;
      dockerSocket.enable = false;
      defaultNetwork.settings.dns_enabled = true;
    };

  # Extra handy packages
  environment.systemPackages = with pkgs; [
    docker-compose
    podman-compose
    podman-tui
  ];
}
I keep these bits on separate files (nomad.nix, podman.nix, docker.nix)
and add them to the machines I want. I like this composability aspect of NixOS,
helps me remember how I did things in the past.
Now I need a ZFS dataset for my Nomad data:
$ sudo zfs create -o mountpoint=legacy -o compression=lz4 zroot/nomadCreating a new dataset (or partition) doesn’t help much if I don’t mount it
😛 Nomad stores its data in /var/lib/nomad, where my
new partition should be. I added an entry to my hardware-configuration.nix
to mount the partition on boot, while on other OSes you should hack
/etc/fstab.
After adding the new nomad.nix snippet on my dotfiles
repository I rebuilt
the system with: sudo nixos-rebuild switch --flake . Now we wait for a Nomad
to visit our server.
Nomad UI will be listening on port 4646, accessible from any browser. This is
what I see in the Nomad’s web UI for my “client”:
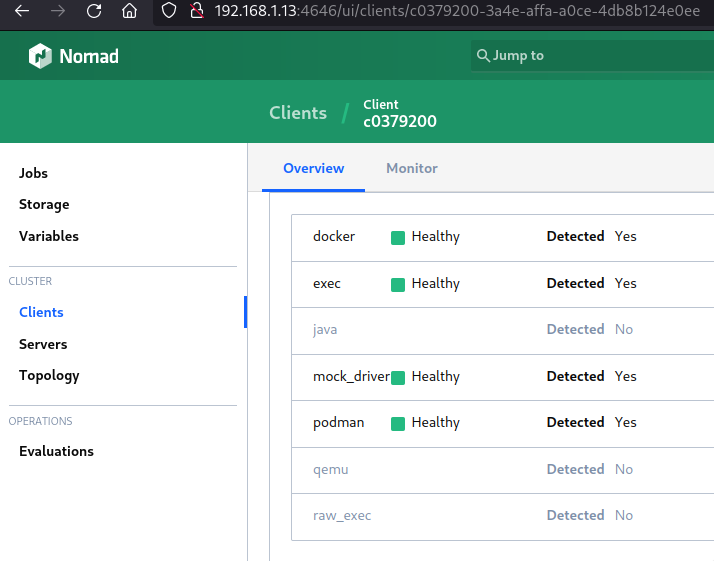
Screenshot of the Nomad Web UI showing the supported task drivers. Nomad detected Docker and Podman :)
We have Nomad running. Does it work? Let’s try an example job (Redis),
created with nomad job init --short:
$ nomad job init --short
Example job file written to example.nomad.hcl

$ grep driver example.nomad.hcl
      driver = "docker"

$ nomad job run example.nomad.hcl
==> 2023-10-17T16:00:36-03:00: Monitoring evaluation "59a89060"
    2023-10-17T16:00:36-03:00: Evaluation triggered by job "example"
    2023-10-17T16:00:37-03:00: Evaluation within deployment: "8d3abb2b"
    2023-10-17T16:00:37-03:00: Allocation "3514215c" created: node "c0379200", group "cache"
    2023-10-17T16:00:37-03:00: Evaluation status changed: "pending" -> "complete"
==> 2023-10-17T16:00:37-03:00: Evaluation "59a89060" finished with status "complete"
==> 2023-10-17T16:00:37-03:00: Monitoring deployment "8d3abb2b"
  ✓ Deployment "8d3abb2b" successful

    2023-10-17T16:01:00-03:00
    ID          = 8d3abb2b
    Job ID      = example
    Job Version = 0
    Status      = successful
    Description = Deployment completed successfully

    Deployed
    Task Group  Desired  Placed  Healthy  Unhealthy  Progress Deadline
    cache       1        1       1        0          2023-10-17T16:10:58-03:00
Sweet, we can submit a job using the Docker driver! As this job uses dynamic
port mapping, we get a “random” port to connect to the container. In this case,
Nomad mapped the default Redis port 6379 to the host port 24825. You can get
the host port in the Web UI or via nomad alloc status <allocation-ID>. I got
the Allocation ID from nomad job status example.
I used redis-cli to check if this job is working:
$ nix shell nixpkgs#redis

$ redis-cli -p 24825 -h 192.168.1.13
192.168.1.13:24825> ping
PONG
192.168.1.13:24825>
😎
For my next steps, I want to understand the different types of jobs and how to manage a “production” Nomad cluster. I wanted to play with Nomad for a while and now I’ll go deep into it. Or at least until I find the next toy (Incus?)